Difference between revisions of "Modeler:Tutorial/Constraints"
m (Marcow moved page Modeler:Constraints to Modeler:Tutorial/Constraints without leaving a redirect) |
m |
||
| Line 108: | Line 108: | ||
7. Save the project by selecting Save Project from the File menu. | 7. Save the project by selecting Save Project from the File menu. | ||
---- | |||
Back: [[:Modeler:Tutorial/Editing Information Grammar|Editing Information Grammar]] | |||
Next: [[:Modeler:Tutorial/Deriving a Database Schema|Deriving a Database Schema]] | |||
[[Category:Modeler]] | [[Category:Modeler]] | ||
Revision as of 05:53, 28 February 2013
In this lesson you will learn how to add constraints to the information grammar using the Diagram Designer.
The constraints you are adding will not be applied to the population. As a result it is posible to add population that violates the constraints in the information grammar.
Adding unicity constraints
Step 16
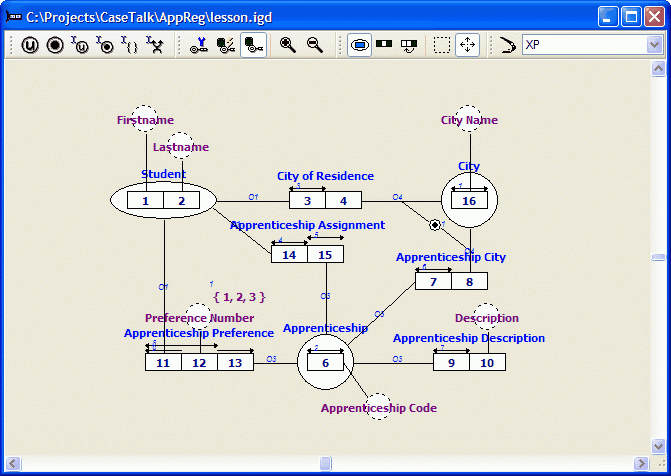
1. Open the Diagram.
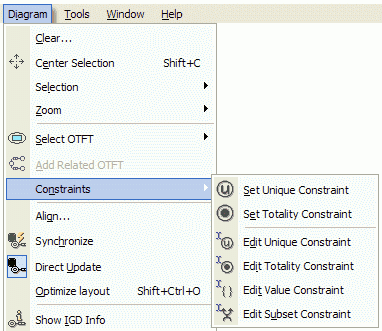
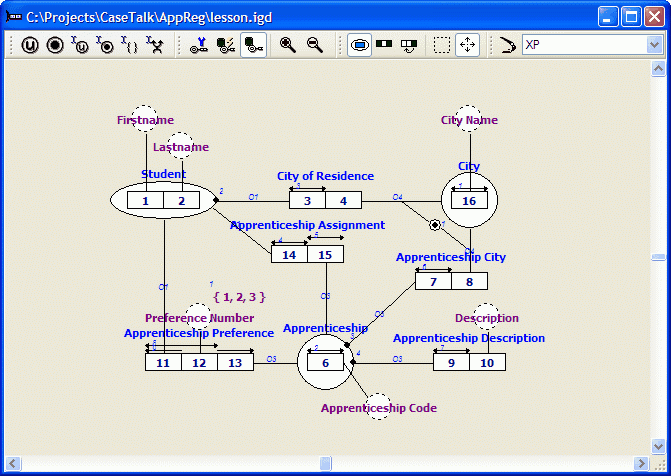
2. Click on 'Student' in the Diagram Designer, then select the menu 'Diagram\Constraint\UC'.
3. Repeat step 2 to add the unicity constraint to 'Apprenticeship'.
4. Hold the Ctrl-key and select role 3.
Note: You may select multiple roles also using the multiple role button from the diagram toolbar.
5. Select the menu 'Diagram\Constraint\UC'.
6. Repeat steps 4 and 5 to add the unicity constraints to the seperate roles 14, 15, 7 and 9.
7. Hold the Ctrl-key and select both roles 11 and 12.
8. Select the menu 'Diagram\Constraint\UC'.
9. Repeat steps 7 and 8 to add the uncity constraint to role combination 11 + 13.
Adding totality constraints
Step 17
1. Hold the Ctrl-key and select role 3, then select the menu 'Diagram\Constraint\TC'.
2. Repeat step 1 to add totality constraints to the seperate roles 7 and 9.
Removing intra fact type constraints
Step 18
1. Select the fact type 'Assigned Apprenticeship' in the Diagram Designer.
2. Select Delete Constraint, UC5 (over role 15) from it's popup-menu.
The unicity constraint is now removed from both the IG and the IGD.
3. Open the Edit menu and select Undo.
Removing and adding inter fact type constraints
Step 18
1. Select inter fact type totality constraint 1 (besides City).
2. Select Delete from it's popup-menu.
3. Hold the Ctrl-key and select both role 4 and 8.
4. Select the menu 'Diagram\Constraint\TC'.
Adding comment to constraints
Step 19
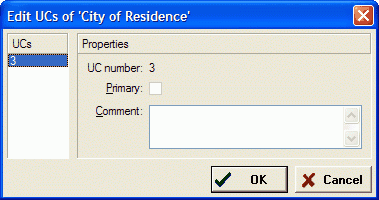
1. Select the fact type 'City of Residence'.
2. Select the menu 'Diagram\Constraint\Edit UC':
You can now enter your comment for the constraints related to 'City of Residence'.
This comment will be displayed in the Fact Type Documentation.
3. Close the window.
Note: In a similar way you can add comment to unicity constraints and value constraints.
Adding subset constraints
Step 19
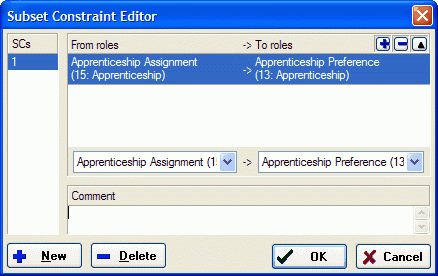
1. Select the menu 'Diagram\Constraint\Edit SC':
2. Click New.
3. Open the left combobox and select role 15, then open the right combobox and select role 13 as is displayed above.
4. Click Ok.
Select Show Subset Constraint Info from the IGD menu:
A list of subset contraints will be displayed.
5. Open the Edit menu and select Undo SC Editor.
6. Select Hide from the popup-menu of the Subset Constraints Info box.
7. Save the project by selecting Save Project from the File menu.
