Difference between revisions of "InstallPortal"
m (→Installing) |
|||
| (20 intermediate revisions by the same user not shown) | |||
| Line 1: | Line 1: | ||
= CaseTalk Portal = | = CaseTalk Portal = | ||
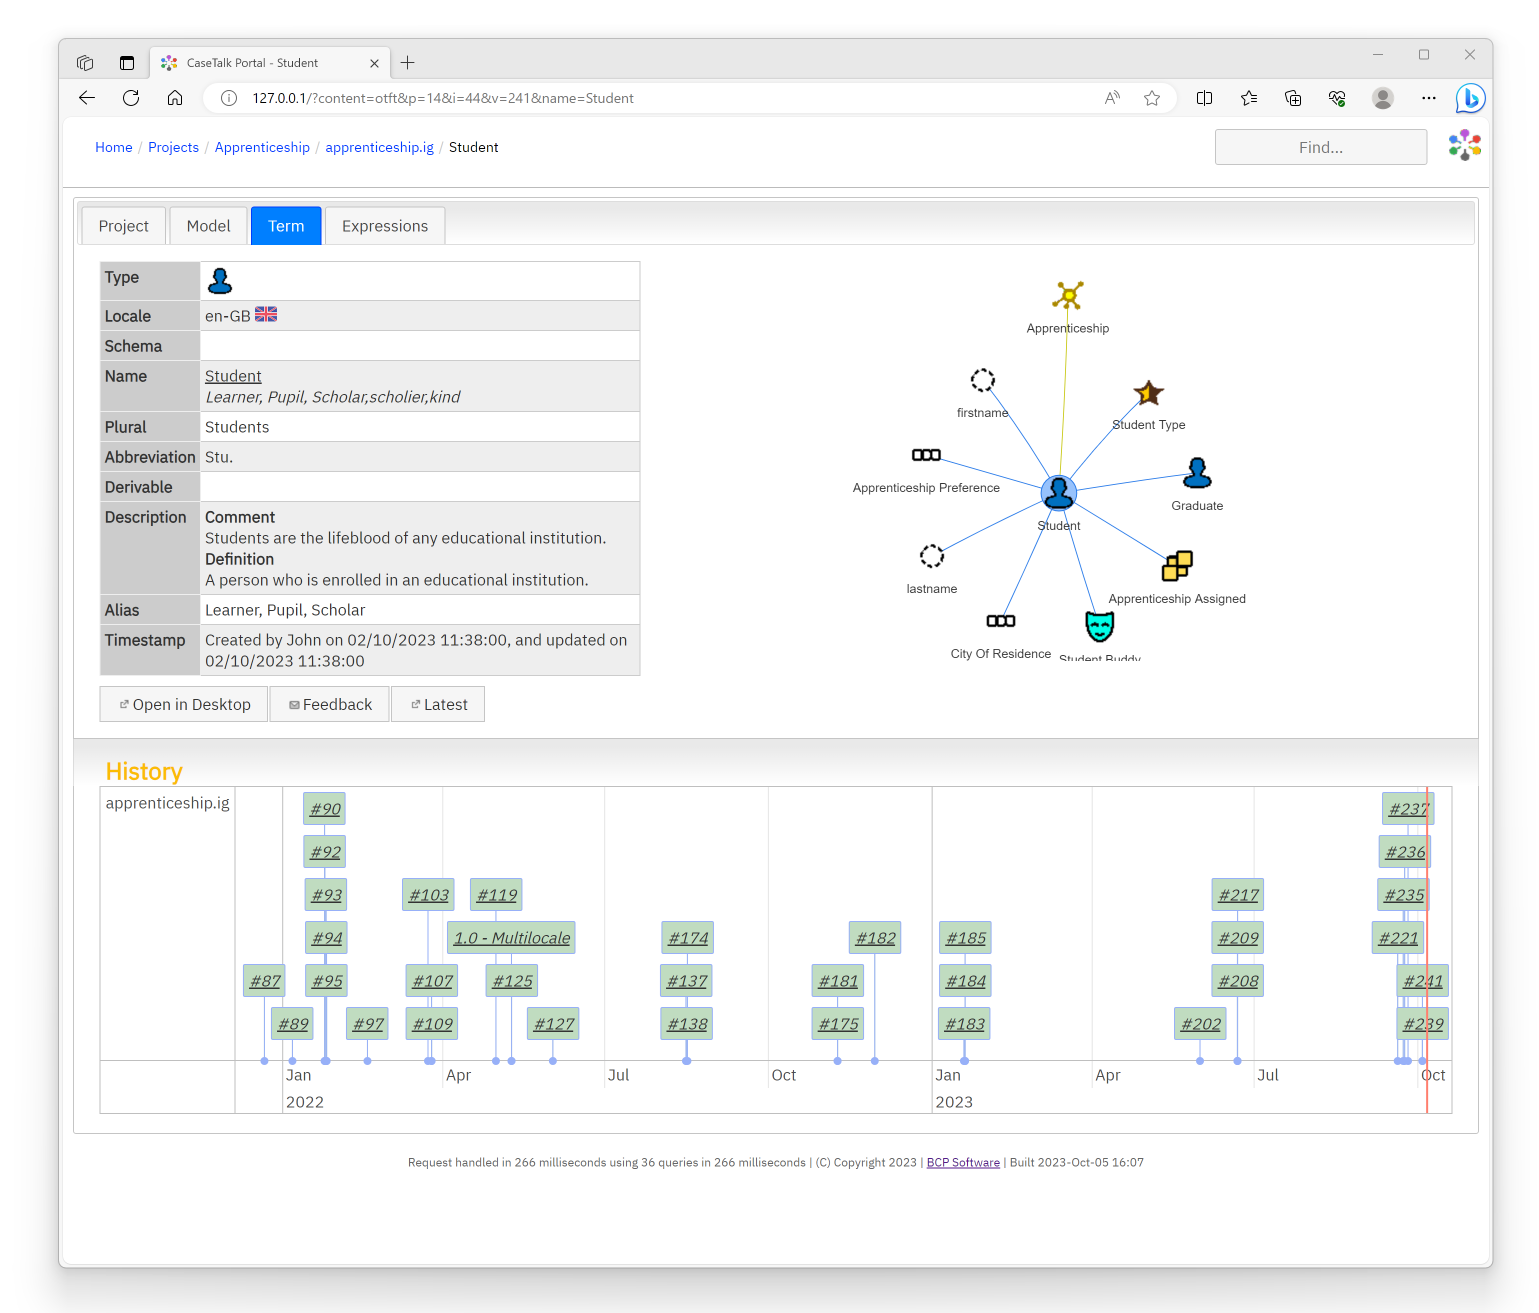
The entire portal software is controlled with a ISAPI dll, static files and a database configuration. The portal may be downloaded from the website as ''CaseTalkPortal.zip''. | The entire portal software is controlled with a ISAPI dll, static files and a database configuration. The [https://www.casetalk.com/products/portal portal] may be downloaded from the website as ''CaseTalkPortal.zip''. | ||
https://www.casetalk.com/images/stories/screens/portal1.2.png | |||
== Unpacking == | == Unpacking == | ||
Once the portal software is extracted from the zip file. The folder structure should resembled the above. | Once the portal software is extracted from the zip file and copy those to the '''c:\inetpub\wwwroot''' folder. The folder structure should resembled the above. | ||
portal\ | c:\inetpub\wwwroot\ | ||
portal\ | |||
dist\ | |||
ftp\ | |||
msodbcdiag17.dll | |||
msodbcsql17.dll | |||
msodbcsqlr17.dll | |||
Portal_Isapi.dll | |||
Portal_Isapi.ini | |||
web.config | |||
== | == IIS Prerequisites == | ||
To install | * IIS needs to contain the ISAPI feature. | ||
* VC_Redist.x86 (from the free download section) | |||
== Portal Files == | |||
To install the portal in IIS, follow the steps below: | |||
# Create a '''Application Pool''' called ''CaseTalkPortal'' which has ''No Managed Code'' and ''Classic pipeline mode''. | # Create a '''Application Pool''' called ''CaseTalkPortal'' which has ''No Managed Code'' and ''Classic pipeline mode''. | ||
# Make sure the ''CaseTalkPortal'' pool has the advanced settings set to ''Enable 32 bit applications''. | # Make sure the ''CaseTalkPortal'' pool has the '''advanced settings''' set to ''Enable 32 bit applications''. | ||
# Under the ''Default Website'' add an Application which is hooked to the ''CaseTalkPortal'' Application, and points to the physical folder | # Under the ''Default Website'' add an '''Application''' which is hooked to the ''CaseTalkPortal'' Application, and points to the physical folder ''portal\''. | ||
# Once ''CaseTalk Manager'' is run successful, copy the ''CaseTalkManager.ini'' from the roaming profile folder into ''Portal_Isapi.ini'' for proper database connection configuration. | # Once ''CaseTalk Manager'' is run successful, copy the ''CaseTalkManager.ini'' from the roaming profile folder into ''Portal_Isapi.ini'' for proper database connection configuration. | ||
# In the ''portal_isapi.ini'' add the line "''homepage= | # In the ''portal_isapi.ini'' add the line "''homepage=\myportal''" to the ''settings''-section. This is used to navigate users to the proper startpage when clicking the ''Home''. Please adjust to your appropriate setup. | ||
# For cache optimizations, the ''Output Caching'' can be tweaked to result in the following '''web.config''': | # To customize the introduction- and about-tab, please read the section at the bottom of this page. | ||
== IIS Configuration == | |||
# Website Handler Mappings: Configure the ISAPI-dll to point to the '''portal_isapi.dll''', and make sure it is executable. This is done through properties and feature permissions. | |||
# ISAPI and CGI Restrictions of the webserver: Add the '''portal_isapi.dll''' to the list and make sure it is allowed to be executed. | |||
# Website Default Document: Add the '''portal_isapi.dll''' as a default document name. | |||
== IIS Caching == | |||
For cache optimizations, the ''Output Caching'' can be tweaked to result in the following '''web.config''': | |||
<?xml version="1.0" encoding="UTF-8"?> | <?xml version="1.0" encoding="UTF-8"?> | ||
<configuration> | <configuration> | ||
<location path="dist"> | |||
<system.webServer> | |||
<staticContent> | |||
<clientCache cacheControlMode="UseMaxAge" cacheControlMaxAge="00:30:00" /> | |||
</staticContent> | |||
</system.webServer> | |||
</location> | |||
<system.webServer> | <system.webServer> | ||
<caching> | <caching> | ||
<profiles> | <profiles> | ||
<add extension=".dll" policy="CacheForTimePeriod" kernelCachePolicy="CacheForTimePeriod" duration="00:00 | <add extension=".dll" policy="CacheForTimePeriod" kernelCachePolicy="CacheForTimePeriod" duration="00:30:00" varyByQueryString="content,v,name,p,icons,filetypes,keyword" /> | ||
</profiles> | </profiles> | ||
</caching> | </caching> | ||
<handlers accessPolicy="Script, Read, Execute"> | |||
<remove name="ISAPI-dll" /> | |||
<add name="ISAPI-dll" path="*.dll" verb="*" modules="IsapiModule" scriptProcessor="Portal_Isapi.dll" resourceType="File" requireAccess="Execute" allowPathInfo="true" preCondition="bitness32" /> | |||
</handlers> | |||
</system.webServer> | </system.webServer> | ||
</configuration> | </configuration> | ||
The above can be edited by hand (make sure the file maintains the correct permissions for IIS), or done through various configuration screens using the ''IIS Manager'': | |||
Navigate to the Website Portal Folder and double click the ''Output Caching'' icon: | |||
[[File:OutputCaching.png]] | |||
Navigate to the '''Dist''' folder and double click the ''Configuration Editor'' and add the following to mark the entire folder as static content: | |||
[[File:DistStatic.png]] | |||
== Monitoring == | == Monitoring == | ||
For monitoring the '''Event Viewer''' of Windows can be used. Relevant logs are to be found under ''Windows Logs\Application'' with the source being ''CaseTalkPortal''. | For monitoring the '''Event Viewer''' of Windows can be used. Relevant logs are to be found under ''Windows Logs\Application'' with the source being ''CaseTalkPortal''. | ||
== Customization == | |||
The file '''Portal_isapi.ini''' contains a few lines for database configuration and a more generic section. | |||
[Settings] | |||
Homepage=/ | |||
introduction=/ftp/introduction.html | |||
about=/ftp/about.html | |||
These lines allow customization of the portal glossary home page by injecting a specially crafted html file to be presented inside the ''introduction'' and ''about'' tabs. | |||
Latest revision as of 05:00, 22 April 2025
CaseTalk Portal
The entire portal software is controlled with a ISAPI dll, static files and a database configuration. The portal may be downloaded from the website as CaseTalkPortal.zip.
Unpacking
Once the portal software is extracted from the zip file and copy those to the c:\inetpub\wwwroot folder. The folder structure should resembled the above.
 c:\inetpub\wwwroot\
   portal\
     dist\
     ftp\
     msodbcdiag17.dll
     msodbcsql17.dll
     msodbcsqlr17.dll
     Portal_Isapi.dll
     Portal_Isapi.ini
     web.config
IIS Prerequisites
- IIS needs to contain the ISAPI feature.
- VC_Redist.x86 (from the free download section)
Portal Files
To install the portal in IIS, follow the steps below:
- Create a Application Pool called CaseTalkPortal which has No Managed Code and Classic pipeline mode.
- Make sure the CaseTalkPortal pool has the advanced settings set to Enable 32 bit applications.
- Under the Default Website add an Application which is hooked to the CaseTalkPortal Application, and points to the physical folder portal\.
- Once CaseTalk Manager is run successful, copy the CaseTalkManager.ini from the roaming profile folder into Portal_Isapi.ini for proper database connection configuration.
- In the portal_isapi.ini add the line "homepage=\myportal" to the settings-section. This is used to navigate users to the proper startpage when clicking the Home. Please adjust to your appropriate setup.
- To customize the introduction- and about-tab, please read the section at the bottom of this page.
IIS Configuration
- Website Handler Mappings: Configure the ISAPI-dll to point to the portal_isapi.dll, and make sure it is executable. This is done through properties and feature permissions.
- ISAPI and CGI Restrictions of the webserver: Add the portal_isapi.dll to the list and make sure it is allowed to be executed.
- Website Default Document: Add the portal_isapi.dll as a default document name.
IIS Caching
For cache optimizations, the Output Caching can be tweaked to result in the following web.config:
<?xml version="1.0" encoding="UTF-8"?>
<configuration>
  <location path="dist">
     <system.webServer>
       <staticContent>
         <clientCache cacheControlMode="UseMaxAge" cacheControlMaxAge="00:30:00" />
       </staticContent>
     </system.webServer>
   </location>
   <system.webServer>
       <caching>
           <profiles>
               <add extension=".dll" policy="CacheForTimePeriod" kernelCachePolicy="CacheForTimePeriod" duration="00:30:00" varyByQueryString="content,v,name,p,icons,filetypes,keyword" />
           </profiles>
       </caching>
       <handlers accessPolicy="Script, Read, Execute">
         <remove name="ISAPI-dll" />
         <add name="ISAPI-dll" path="*.dll" verb="*" modules="IsapiModule" scriptProcessor="Portal_Isapi.dll" resourceType="File" requireAccess="Execute" allowPathInfo="true" preCondition="bitness32" />
       </handlers>
   </system.webServer>
</configuration>
The above can be edited by hand (make sure the file maintains the correct permissions for IIS), or done through various configuration screens using the IIS Manager:
Navigate to the Website Portal Folder and double click the Output Caching icon:

Navigate to the Dist folder and double click the Configuration Editor and add the following to mark the entire folder as static content:

Monitoring
For monitoring the Event Viewer of Windows can be used. Relevant logs are to be found under Windows Logs\Application with the source being CaseTalkPortal.
Customization
The file Portal_isapi.ini contains a few lines for database configuration and a more generic section.
 [Settings]
 Homepage=/
 introduction=/ftp/introduction.html
 about=/ftp/about.html
These lines allow customization of the portal glossary home page by injecting a specially crafted html file to be presented inside the introduction and about tabs.